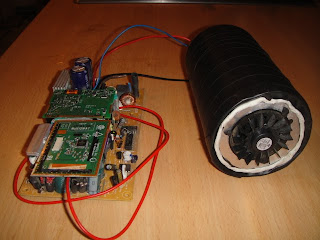
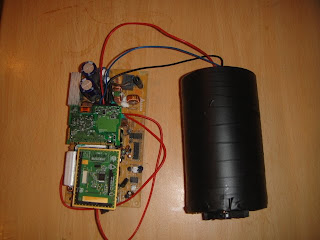
So today Conor had brought in his design of the bomb, which were all really impressed with, very much what we were looking for. Although when putting it in our briefcase, we realised it looked a bit small in there, so we added parts as Piyal has already posted about. Its pretty much finished, but we need to connect up a count down screen, we were thinking of smashing up a cheap digital alarm clock, however Conor pointed out we wouldn't be able to make it count down, so it is thought, not ideal but to have it the timer digitally added to the screen, so I will have to look into how effective that will look and try it out.
Here are the long awaited photos of the bomb as it is now.
We also had some bad boy of a camera take a picture of it, with much higher resolution, so we might get that at some point. (obviously people arent impressed with my 5 megapixel good boy of a phone camera)
toodledoo MS
Showing posts with label Props. Show all posts
Thursday, 25 November 2010
Wednesday, 24 November 2010
Bomb Prop Building Process
After deciding on the bomb being of a ''Canister'' type I concluded that a modified Drinks bottle should suffice in creating the effect. I then took the top which i had previously cut off and pushed it through down the bottle to provide a solid base to rest the fan on which i had previously tried to secure on its own. This was all after I had covered the bottle's exterior entirely in Electrical tape to change the colour mostly but also to give it a more authentic look.
In this picture you can see that I used GRATUITOUS amounts of Plasticine (Which it turns out is a moderate adhesive if you don't really need to stick anything securely). I predominantly used this to secure wires in place but also to attach the circuit boarding because I felt that Glue cement was a bit 'overkill'' and that this would do!
Here is a close up front shot of the 'Canister explosive'. I first off, painstakingly removed the fan from its original housing. i then found a moderate sized piece of aluminium which we had scrapped from an old laptop computer. This all was pretty much wedged on top of the bottles innards which i had previously Secured in and then the fan was (and hopefully still is, even though its in my bag) secured to the aluminium with More plasticine. I finished the look off with.... MORE plasticine to give it a trimmer and, slightly more professional look to it.
One advantage of using the laptop parts was that they are designed originally to be light weight and compact which makes them perfect for things like this. i was able to cut the metal with Scissors and other cutting devices in my tool kit into a oblong (it was meant to be a circle) but also, it is so lightweight that you barely notice it (makes it easier to transport and more resistant to random breaks) as well as it being able to hold the shape apart due to its Sturdy nature.
Now Plasticine Expert, CW
Bomb Making (Props!)
Ok so after being given the tast to make the bomb prop for our film i came up will or sorts of crazy ideas. most of them being C4 explosives and High-tech precision made Boxes. but of course we do not have the time or the resources to make these. then MS reminded me that bombs can look like anything you want them to, referencing the recent story in the news about a ''Printer bomb''. I decided on building a bomb out of scraps of Computer/laptop and something like a cannister and here is what i have come up with so far:


When i was making the bomb prop I was focusing on the front of it. this is why I believe it looks best from the front and so we should use this kind of angle when shooting
Here is a shot from the top, another of the shots I believe we can use when filming (I.E. When its in a briefcase and the briefcase is open.
I will post close ups of different parts shortly and how I made them.
Bomb Disposal Early Retiree, CW
Subscribe to:
Posts (Atom)